pXRF Sample Collection and Preparation: A Field Guide for Exploration and Mining Workflows
14 min read
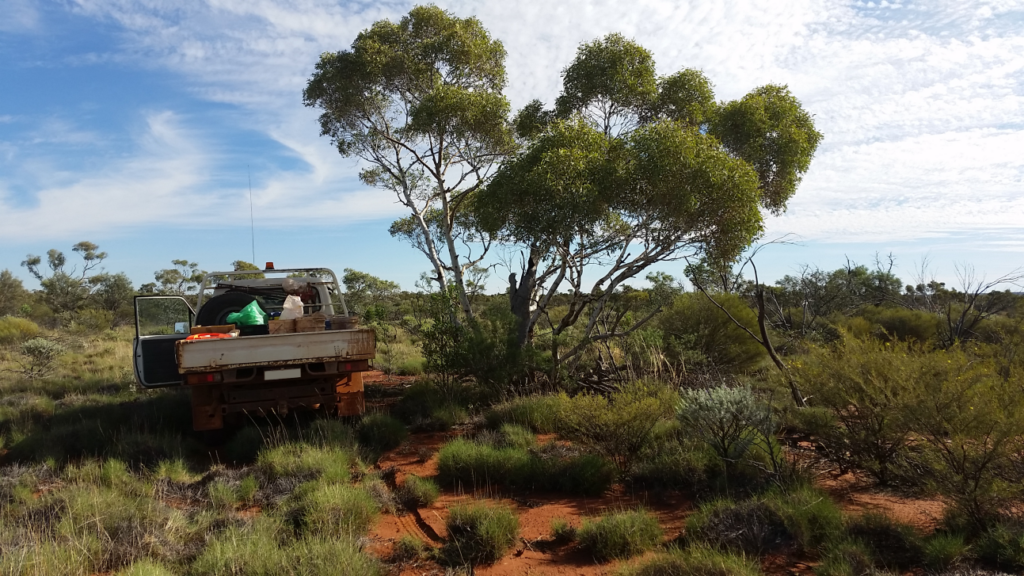
Why sample collection and preparation matter for pXRF data quality
Portable XRF (pXRF) results are highly sensitive to how samples are collected, prepared, and presented for analysis. In exploration workflows, inconsistent sampling practices can introduce significant variability that affects data reliability, QAQC outcomes, and downstream interpretation.
This guide outlines practical field procedures to improve the consistency and representativity of pXRF measurements, with a focus on RC and drill chip sampling, contamination control, and reproducible field workflows used in mineral exploration programs.
The first thing to say is that the choices you make in sample preparation depend on three things: your sample type, how representative the sample is of what you actually want to measure, and the time available. The ideal sample for XRF is dry, fine-grained, and homogeneous — but pXRF in the field has to be fit for purpose. The aim here is not to build a second laboratory on site. Setting up rigorous sample preparation is always worthwhile, but in this article I want to focus on the faster, simpler field approaches that still give reliable, usable data.
Best Practices for pXRF Field Sampling (RC, AC, Core)
Samples for pXRF fall into two groups: consolidated (rock, core, large chips) and unconsolidated (soil, fines, powders, pulps). A dry, fine-grained powder is ideal — provided it genuinely represents what you want to analyse.
For consolidated samples it depends on grain size and on what you are trying to achieve: the bulk signature of the rock, or the signature of a specific alteration. In some cases analysing directly on the solid sample is fine; in others the sample needs to be ground to a powder first.
RC and AC drilling
RC and AC drilling give you chips and a fine-grained powder. Because of how the sample is produced, it is already homogenised across the metre, so the best you can achieve is the bulk chemistry of that metre. How you analyse it then depends on the drilling speed, whether you have someone dedicated to the task, and whether you want results at the rig or later at the office.
My view is that pXRF is genuinely useful at the rig, where it can help the geologist in real time. But when the drilling is fast, a two-person crew already has its hands full with sampling — adding pXRF on top is difficult, and bringing samples back to the office becomes the sensible option.
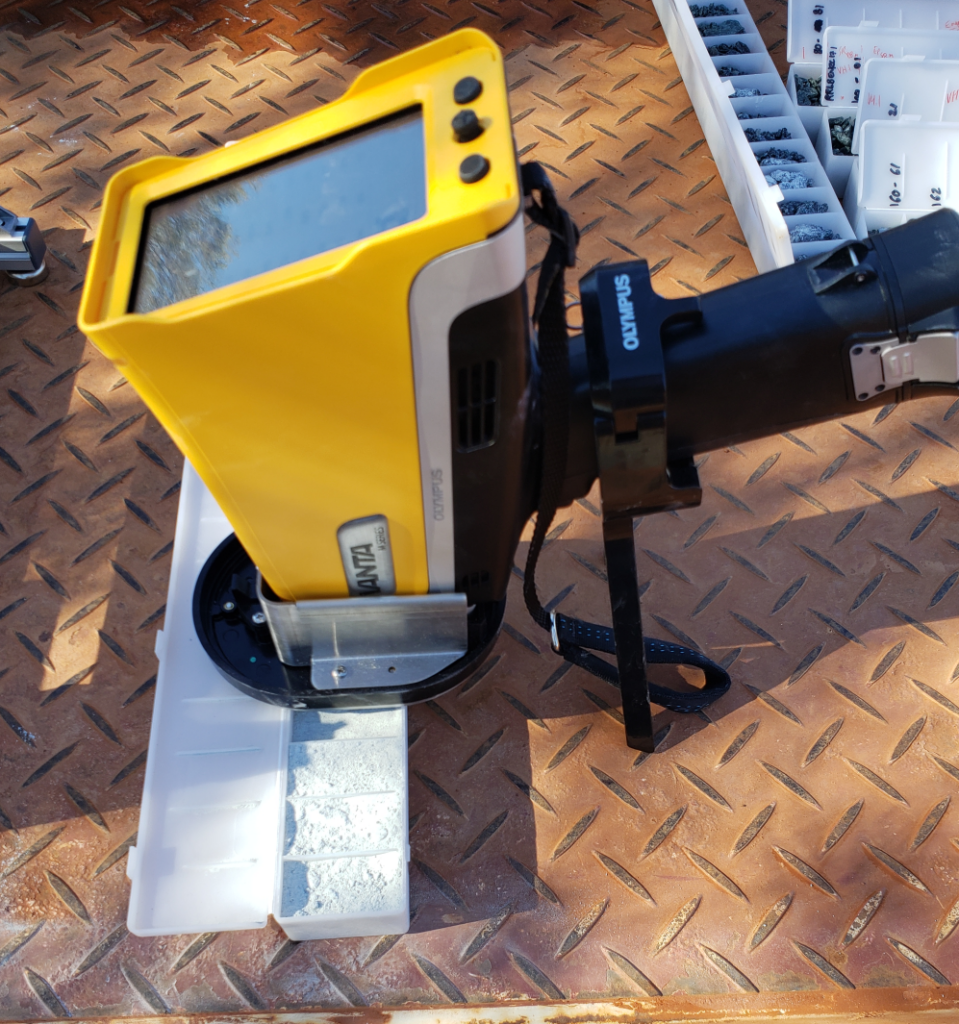
My preferred method is to fill a chip tray with the fine fraction while sieving. That tray can be analysed at the rig or taken back to the office later. The tray needs to be filled to the top and gently compressed; the instrument then sits over it on a soil foot and analyses cell by cell.
If you would rather not fill two trays (one of fines, one of washed coarse chips), you can analyse directly on the coarse chips back at the office. I find this method average at best. If the chips aren’t filled to the top, there’s too much gap between the window and the rock; the many small chips scatter the beam; and in weathered or altered ground the clays are washed away, so the analysis no longer represents the rock. It works for picking up the main lithology and tracking major downhole changes, but don’t expect a reliable analysis every metre. If you do want to work on chips directly, I’d use the instrument on a stand or work station at the office, place a chip with a flat face against the window, and keep the shield cover on. Grinding a flat face helps, and the chip must be representative of the metre.
When the rig is slow, I really like having a field stand or work station on the back of the ute: as you sieve to fill your chip tray, scoop the fines into a plastic cup and analyse it on the spot. No samples to bring back — cups are filled and emptied as you go.
There’s also the option of a multi-cup sampler accessory that mounts the pXRF over a row of cups. I’ve found it a little messy in practice — it’s easy to lose track of the cup order — and the chip-tray method is simpler to keep on top of at the rig, especially at a fast drilling rate.
Finally, you can analyse straight on the sample pile, compacting it first and using the soil foot. It works, but I don’t recommend it: the instrument gets very dusty, and leaving a pXRF on the ground while people move around sampling is a safety hazard.
Core drilling
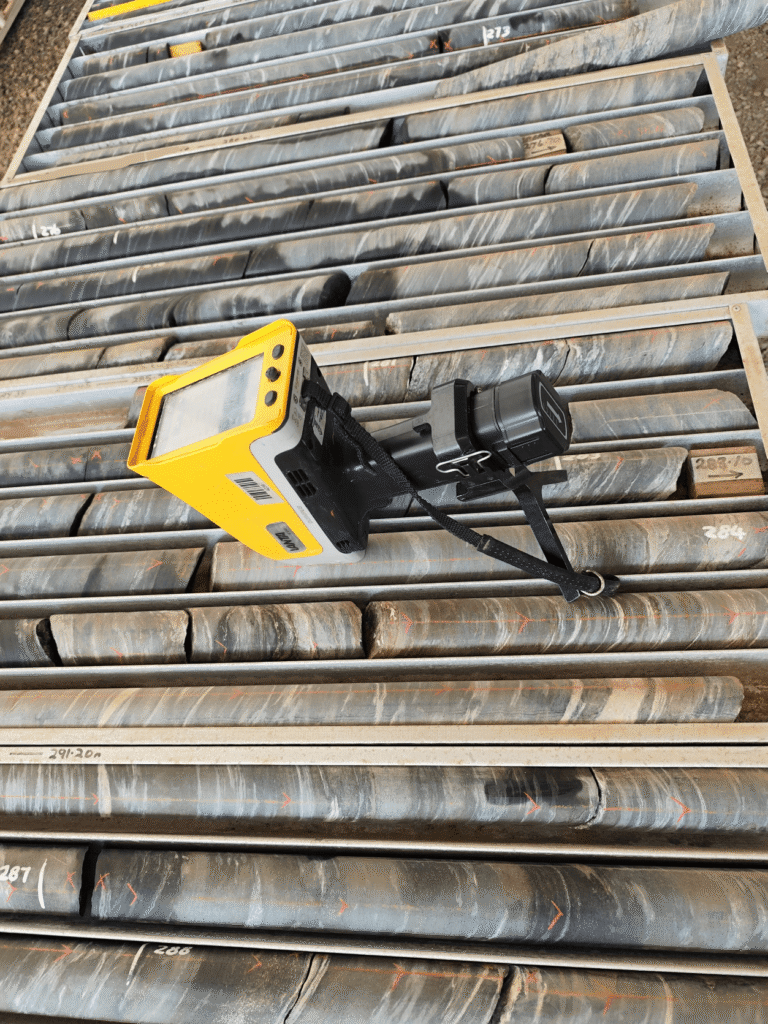
With core, the main questions are what you want to achieve and whether the pXRF spot lands on a representative section — which again comes back to grain size, and to whether you’re after lithology or alteration. For core I’d strongly suggest adding a sample geology field to your notes — matrix, vein, clast, mineral — so you always know what you actually measured.
For lithology and alteration in fine-grained rocks, analysing directly on the core gives relatively good results; just make sure the window sits on a representative spot. As you move into medium-grained rocks, increase the number of measurements to account for heterogeneity. You’ll see a few spiky results in some metres, but overall the method lets you map lithology downhole and track alteration and pathfinders where you measure in altered zones. Use the soil foot, and have a geologist check where the spots are taken — marking the pXRF spots beforehand works well. The soil foot is the best option currently available for keeping the instrument off your hand, but it could be improved by an accessory designed to work on core trays. Someone will design a holder that works well on rounded core one day.
If you are mostly drilling through coarse-grained rocks, you’ll want to cut or chip and grind the sample for the best results. It’s more time-consuming but necessary for representativity. If you only have a few intrusions across mostly fine- to medium-grained rock, I wouldn’t worry too much — analyse directly on core, because the signal itself differs from the fine-grained host and the contrast will pick the intrusion up.
Stored samples
You may just acquire a pXRF and want to run it on samples you have on hand — often pulps from the lab, or chips and core in storage. For stored chips and core, everything above applies. For pulps, I’ve seen a fast method of measuring through the paper bag and applying a correction afterwards. I haven’t done it myself, but it’s possible. For the best results I’d scoop the pulp into plastic cups and use a field stand, an office work station, or an automated carousel.
Automated analysis with robots
For fast, automated results there is now the option of a robot on site. If you cost out an operator’s time, these machines are genuinely affordable. The best known is the GERDA — you mount a pXRF on it and it analyses directly on chip trays and on core. Other companies build similar robots. This is an excellent approach if you want to run analyses in the office on every sample, every day you drill.
Soil and rock samples
Soil samples can be analysed directly on the ground with the soil foot, or you can dig, sieve, and homogenise the sample and analyse it in a cup or field sample holder — it depends a lot on your ground and the type of soil sample. For rock field samples, analyse on a flat surface of the rock; manually grinding a small flat face is a quick way to get better results.
A note on safety
A pXRF emits ionising radiation, so the same rules apply whatever set-up you use:
- No part of the body should be near the measurement window. The window must always be positioned so the beam fires into the sample, never toward an operator or out into the open.
- Always use the manufacturer’s shielding. Commercial field stands and work stations are interlocked and shielded for a reason — that protection should never be removed or bypassed.
- Maximise distance and minimise time near the analyser, and make sure the instrument can’t be knocked, tipped, or left firing unattended.
- Only trained, authorised operators should use the instrument, the relevant radiation management plan should be followed, and the instrument stored securely when not in use.
The only home-made equipment worth considering is something to hold the pXRF stably in place, or a sample holder — and only ever as a positioning aid, never as a substitute for the manufacturer’s shielding, and only where all of the safety rules above are respected.
QAQC, briefly
QAQC deserves its own article, but the essentials: run blanks to check for contamination and standards to monitor instrument drift — certified standards or your own. Use standards that match what you’re doing (solid versus unconsolidated) and use more than one. On a deposit-scale project a good in-house standard is key, especially when several instruments are used across the same project. Make your life easy: analyse your standards at three set points in the day — morning, lunchtime, and evening — and keep them in the office if you can, so they stay clean and consistent.
My takeaway
There are plenty of options, and the right one depends on your drilling type, location, crew, and budget. The best results I’ve seen come from pXRF run on the fines of RC and AC cuttings, or from pulps. And there’s still a gap in the market: a good tripod or holder that keeps the pXRF stable on any rough surface, including piles on the ground, would solve a real field problem.
Accessories currently available
- Soil foot — a compact support for hands-free analysis; available for Evident Vanta, SciAps and Bruker instruments.
- Field stand / work station — a shielded, interlocked chamber for cups, bags and small samples, usable on a benchtop or in the field on the back of a ute; you can place chips directly or fines in a cup. Available for Vanta, SciAps and Bruker. Larger benchtop kit versions also exist.
- Multi-cup sampler — mounts the pXRF over a row of cups for batch analysis (e.g. the Easy Sampler).
- Automated carousel — runs batches of cups (e.g. the XShot360 from Portable Scientific).
- Benchtop pXRF — accepts rock samples or cups directly, between a handheld and a lab instrument (e.g. SciAps).
- On-site robot — mounts a pXRF to analyse chip trays and core automatically (e.g. the GERDA from MeffaLab).
Useful links
- Evident — 5 XRF accessories for a mining field kit: ims.evidentscientific.com/en/insights/5-xrf-accessories-mining-geochemical-analysis-field-kit
- Portable Scientific: www.portablescientific.com.au/products/
- Wiltec Solutions: www.wiltecsolutions.com.au/
- MeffaLab GERDA: meffalab.com/gerda/
- SciAps benchtop XRF: www.sciaps.com/products/portable-benchtops/powerhouse-x
- Quantum-RX accessories: quantum-rx.com/en/xrf-accessories/
This article is general information based on our field experience, not professional, safety, or regulatory advice. pXRF devices emit ionising radiation and must be used per the manufacturer’s instructions and the radiation regulations and licensing in your jurisdiction. Product comments reflect our own experience.
By Celia Guergouz, Co-founder, Geozap, June 2026